GitHub Codespaces for Jekyll and Next.js
A quick step-by-step setup guide on how to set up GitHub Codespaces for Jekyll and Next.js.
Why GitHub Codespaces?
I’ve used Jekyll for my blog since I started it in 2014. I loved the idea of the easy liquid templating language and the ease of dropping a new Markdown file into a GitHub repo with GitHub pages, and suddenly, it was published online for free. Over the years, I’ve redesigned it multiple times but never steered away from Jekyll since it just worked out of the box.
But when I got a MacBook M1, it started getting more challenging to set up a Jekyll development environment locally for someone who doesn’t understand the Ruby ecosystem. I then came across GitHub Codespaces and the possibility of running a development environment like it was run locally. I could also run GitHub Codespaces to develop on my iPad as an added benefit! All for free (or at least I’ve never touched the 60 hours you get for free every month).
How to set up GitHub Codespaces for Jekyll
- Create a folder called
.devcontainerat the root of your GitHub project. - Inside that folder, create a file called
devcontainer.jsonand fill it with the content found at the Jekyll repo. - Create a file called
Dockerfileand fill it with this content also from Jekyll main repo. - Commit this to your current repo. It shouldn’t change anything else.
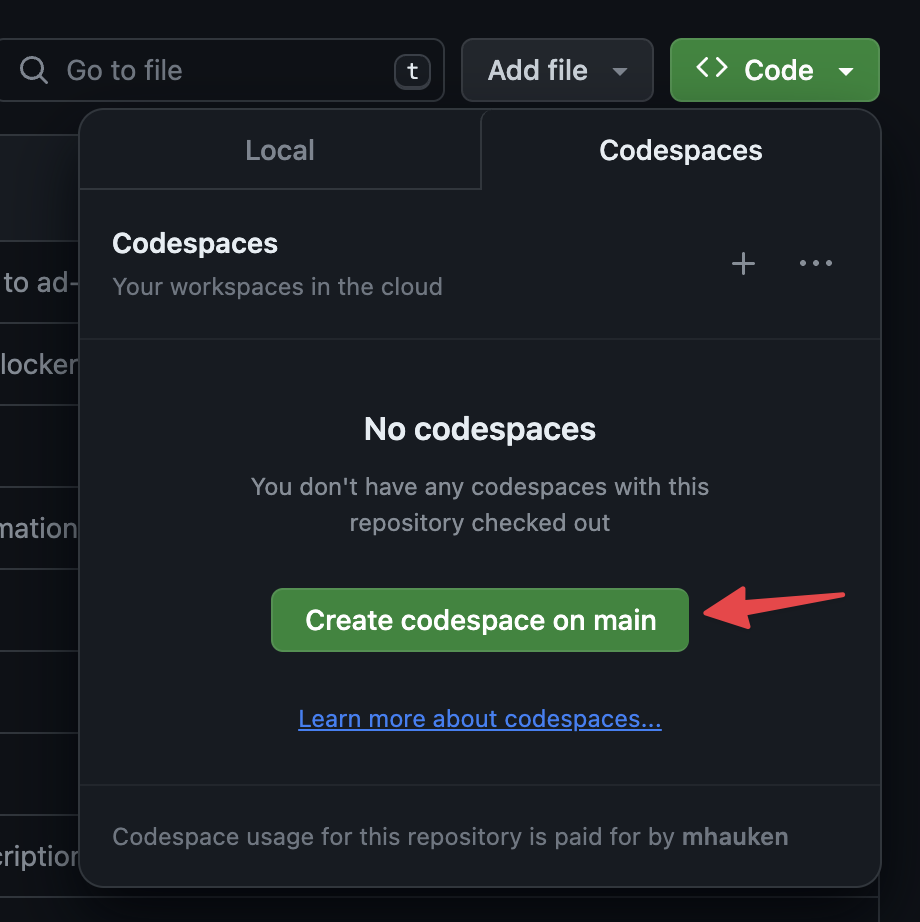
- Now, you can go to GitHub and click code. In the tab that appears, click Codespaces and create a new one.
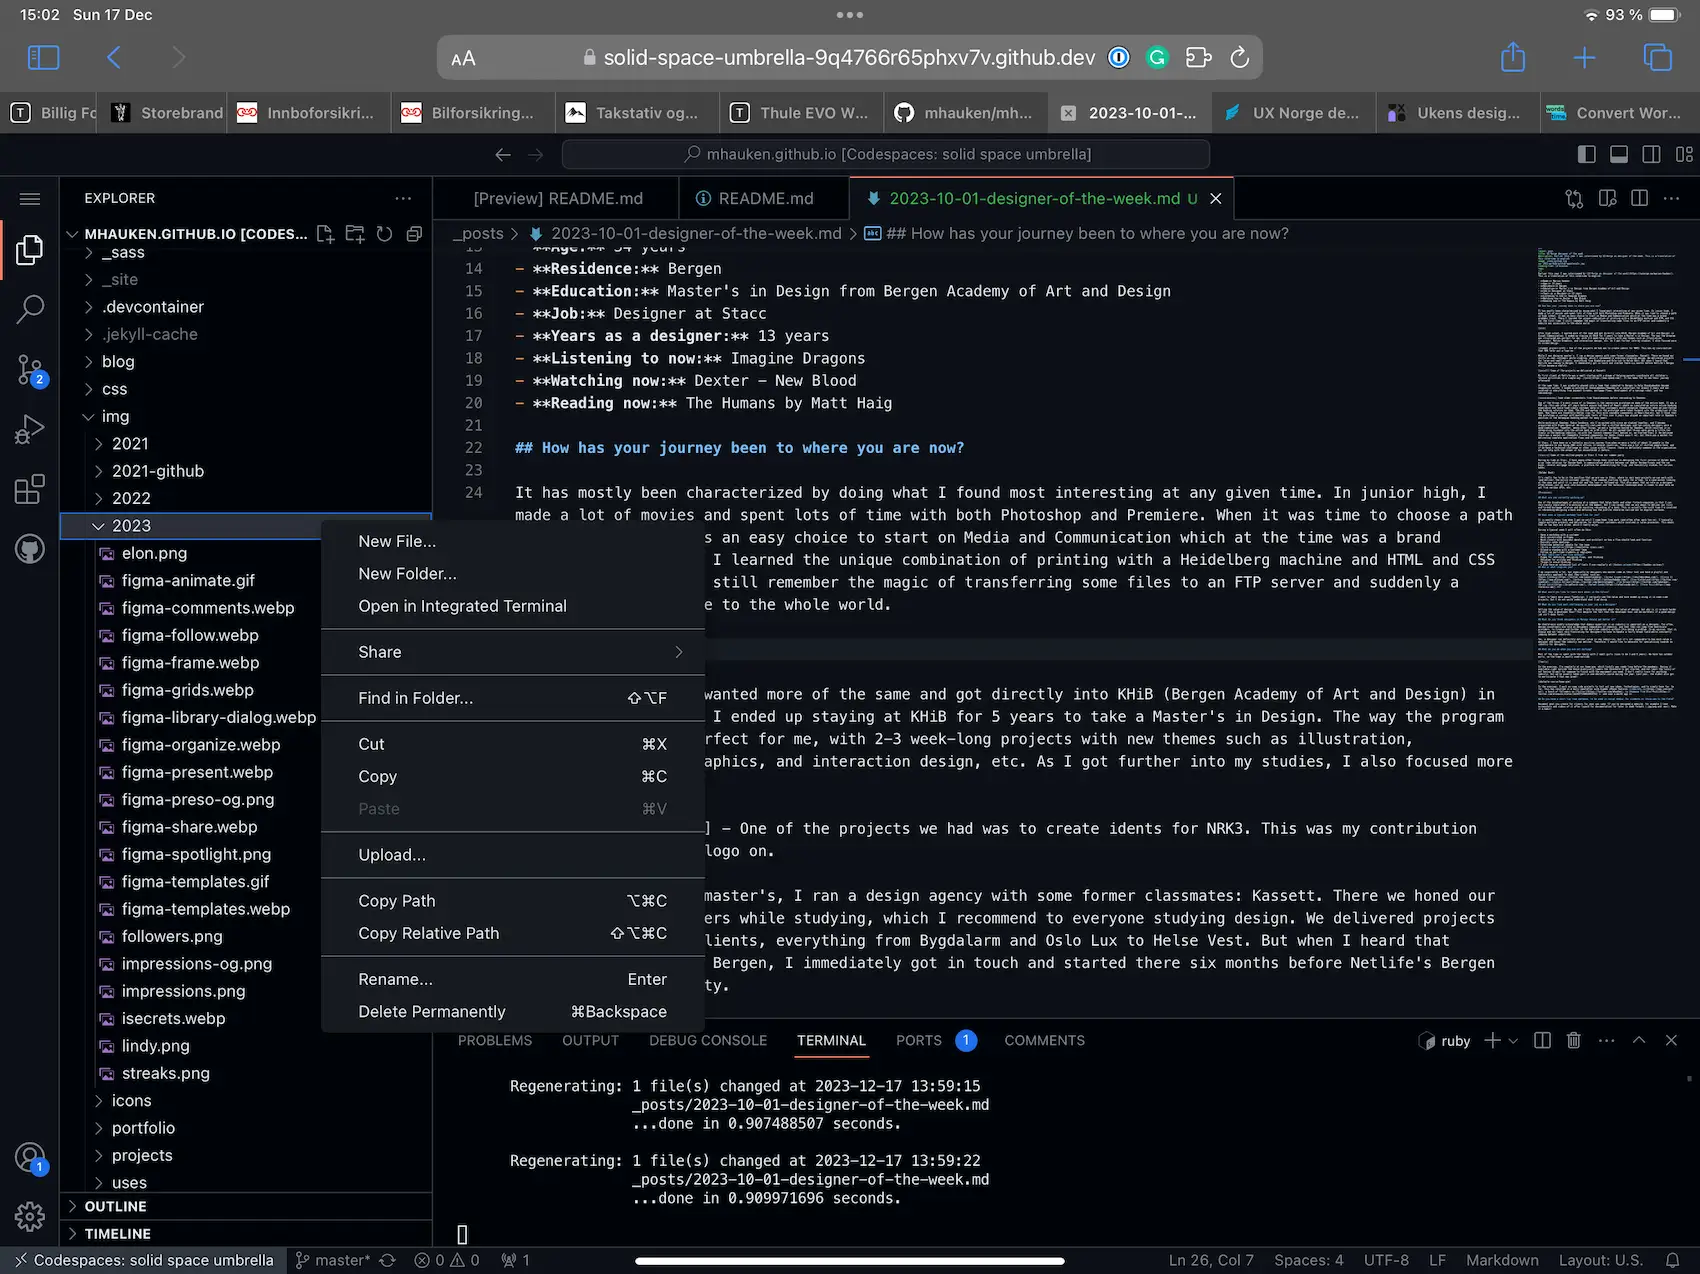
- Now, VSCode should open in your browser, and you should see your full repository.
- Open the Terminal inside VSCode and write:
bundle installto install all dependencies. - When that is done, write:
bundle exec jekyll serve --draftsand hit Enter - The code should now run, and you should get a popup asking if you want to open another window with your Jekyll instance running. You now have a local instance of Jekyll running on GitHub CodeSpaces!
How to set up GitHub Codespaces for Next.js
Setting up GitHub Codespaces for Next.js is much simpler:
- Go to your GitHub repo and click code. In the tab that appears, click Codespaces and create a new one.
- Everything should now auto-install. Type
npm run devin your terminal to run your app. - The code should now run!
