Note taking during user testing
If you've user-tested a product, you know the hassle of taking notes and comparing them across the different users and what they did. Often we've ended up with huge, messy google docs or sheet files. You get an overview if you read everything, but it is hard to see patterns of people failing and organize quotes quickly.
The solution
Five years ago we came across this article from Jessica Crabb, which talks about how they are using Trello to organize their user-testing. It quickly made sense for us, so we tried using it for a couple of tests. It was a lot quicker to type in during the user-test and mark up which users accomplished what. What we were missing, however, was the ability to look at the data from other angles. When you are taking notes, you are taking notes on just one user, but when you are reading your results, you want to read the notes per task and see all the users’ results: Enter Airtable.
The stages of user testing
Airtable is Excel on steroids. It has the same basic functionality as Excel, but with many extra input-forms like images, text-fields ++. It can also be formatted as a Kanban-board like Trello (or as a web-form if needed). Where it shines, though, is its ability to link cells together. The linking makes it possible for us to take notes of one user during the test and then, afterward, flip the data on it’s head and look at each task’s problems. Airtable also has the ability for same-time collaboration, which is quite useful during testing.
While preparing for the test, we go through different note-taking stages, and Airtable guides us through all the steps.
Collection of participants
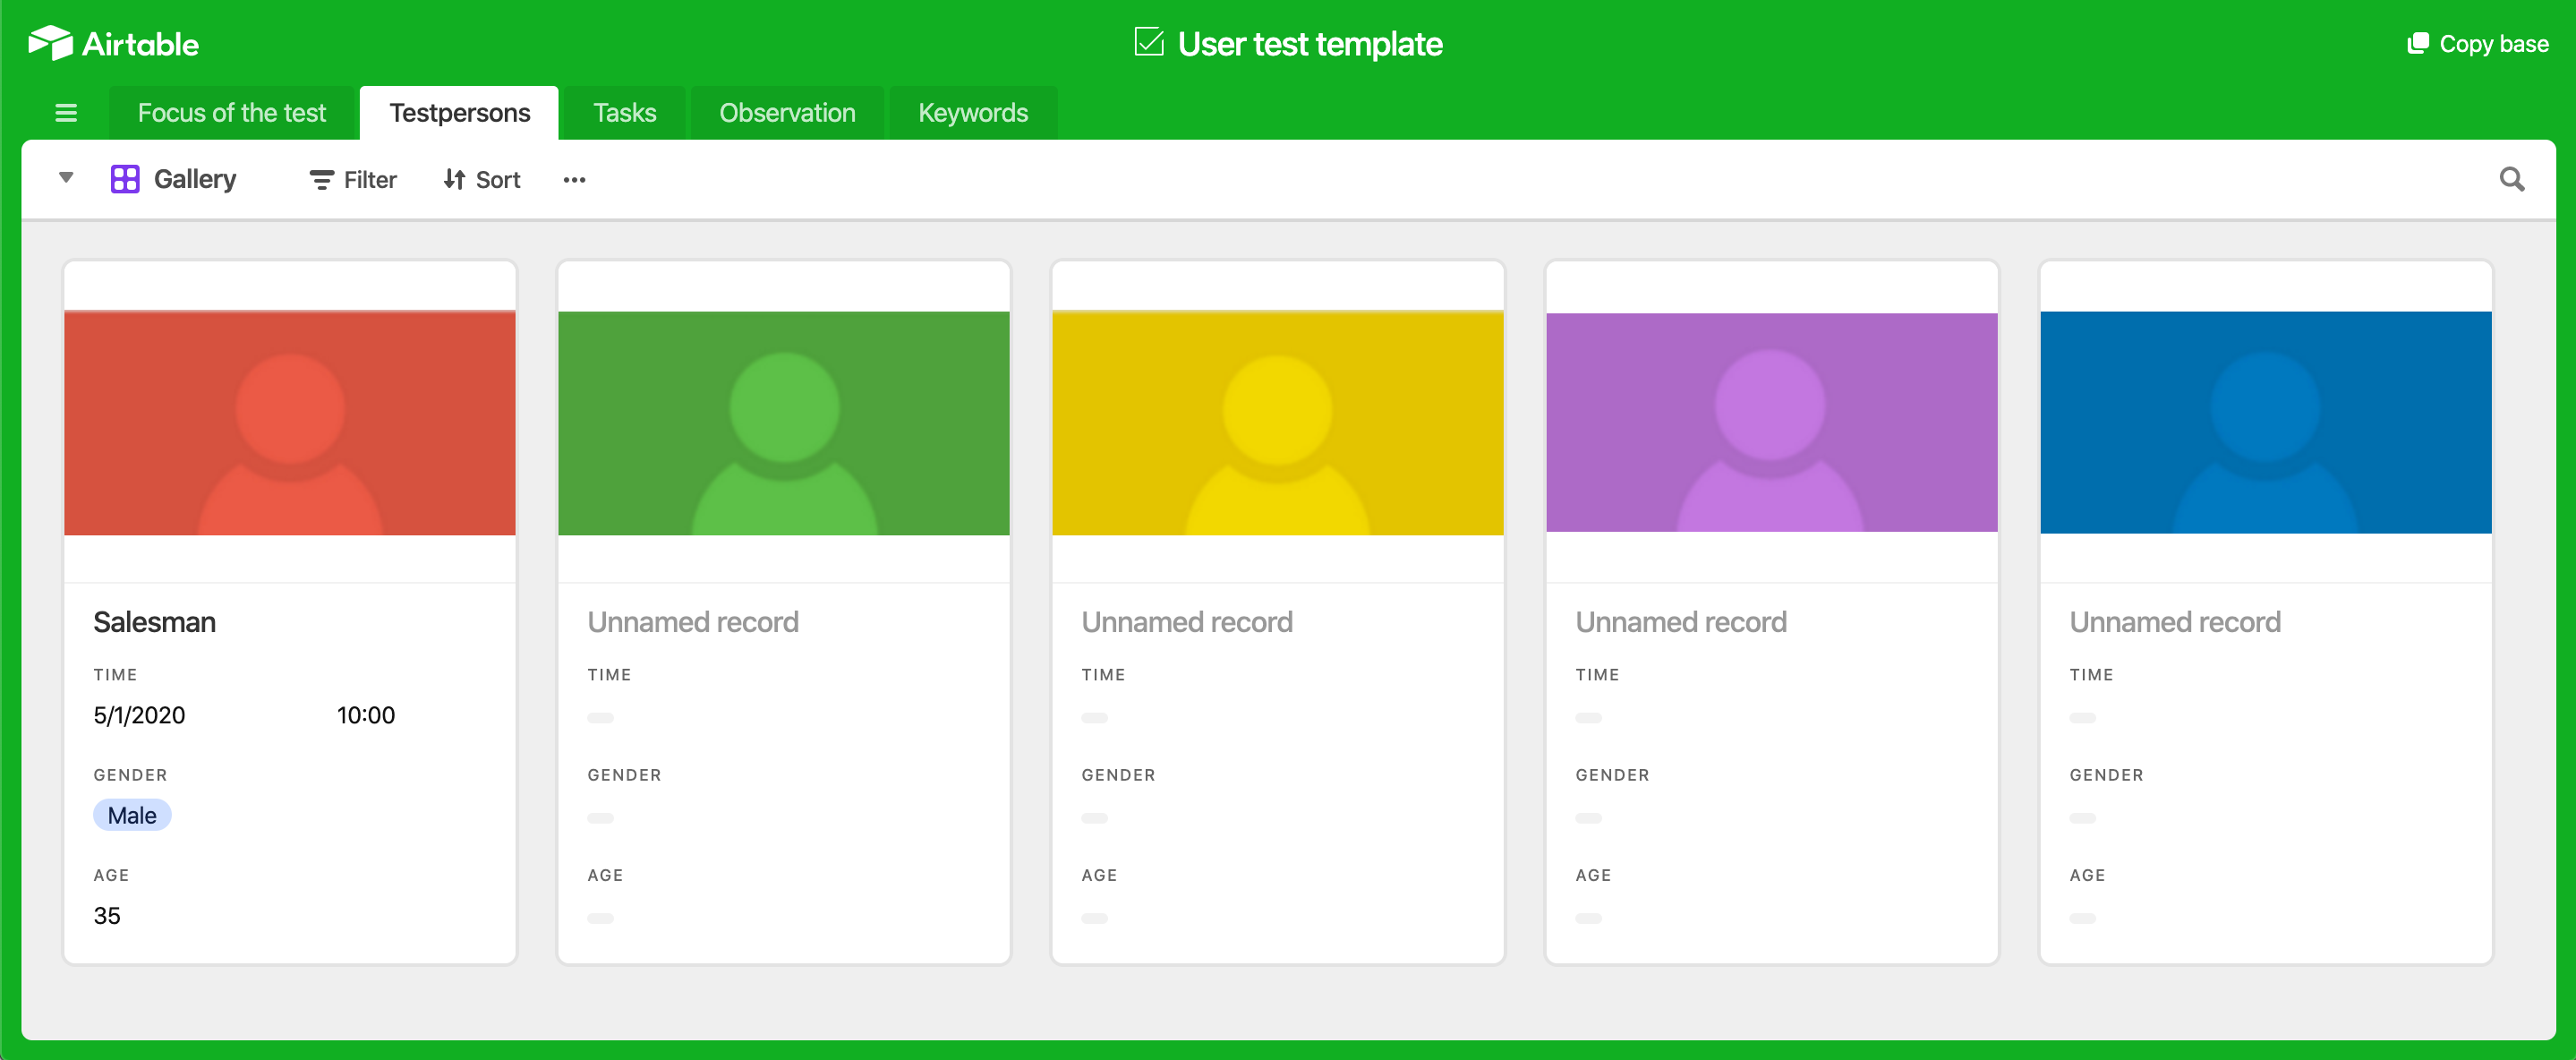
Usually, we have a few requirements for the users that we want to recruit. We then send these requirements to Norstat, which typically helps us recruit people, along with a link to an Airtable-template where they can fill out the test-persons information as soon as they are recruited. This way, we early know how recruitment is going. (After GDPR, you should check if you can store names and information about test-subjects in Airtable.)
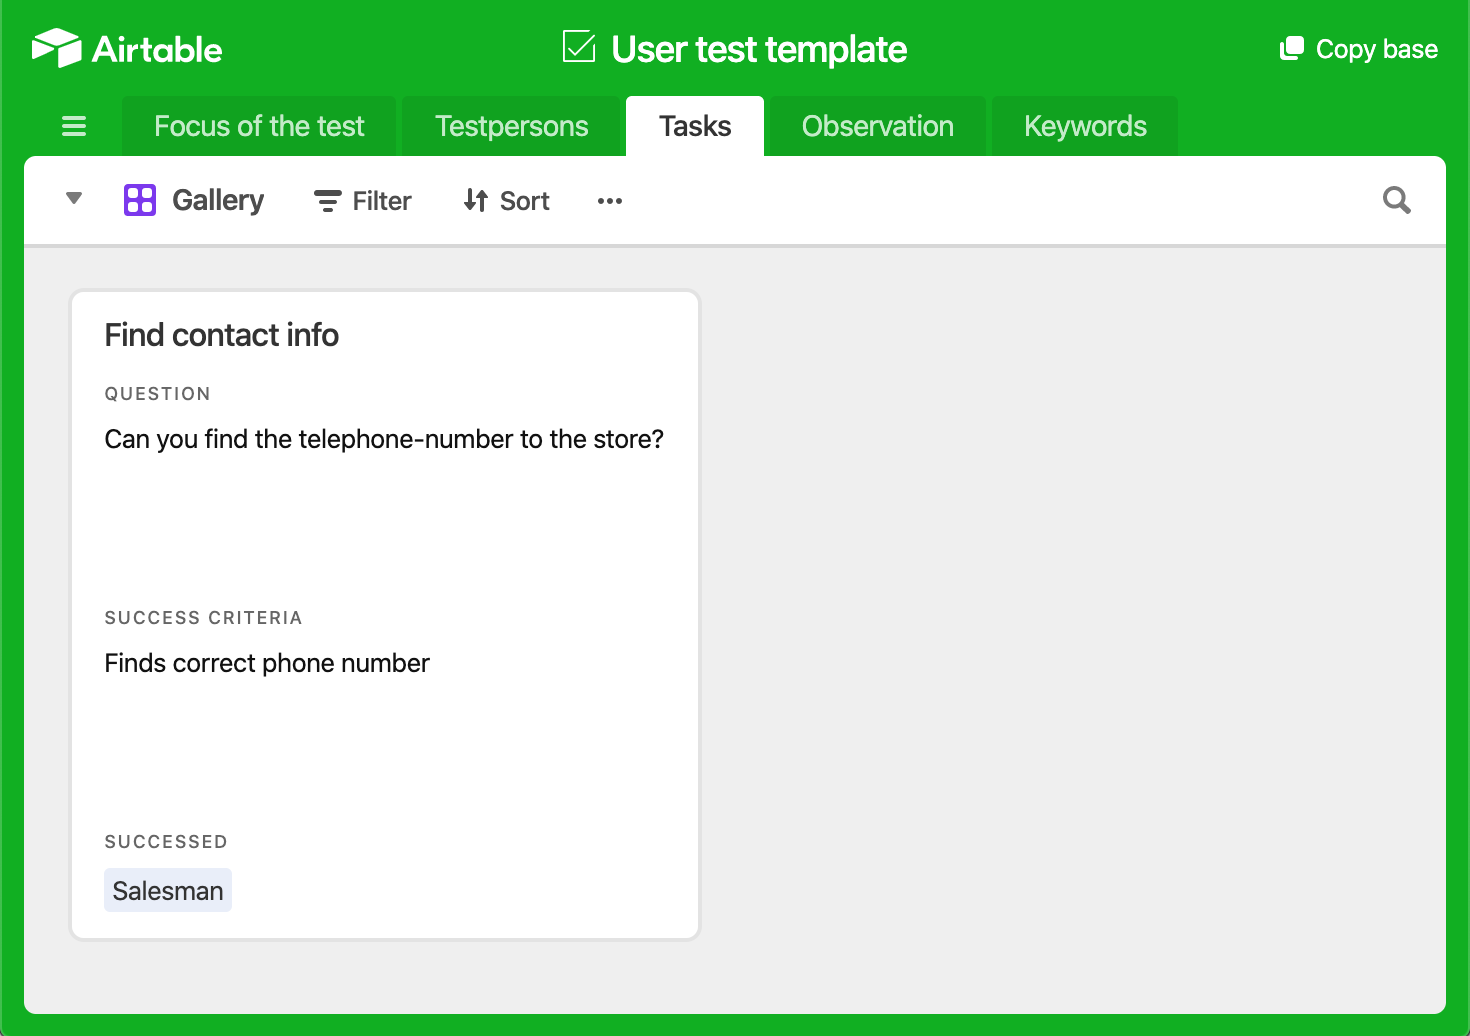
Creating the tasks
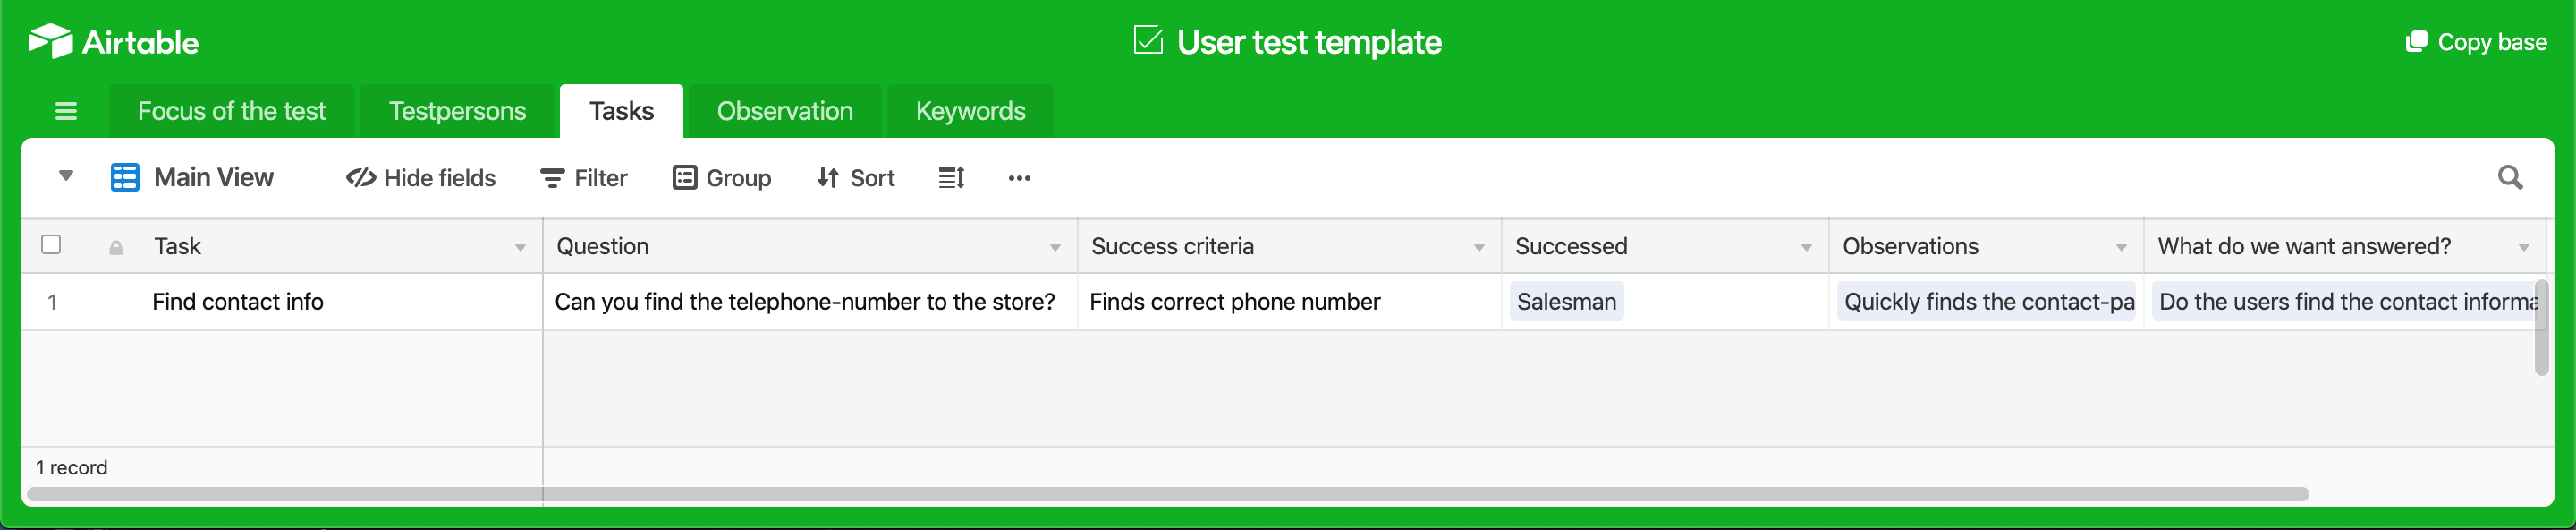
At the same time on another page in the document, we create the tasks that we are going to test and prepare the test. One great feature in airtable is that you can hide information you don’t want to see or view the data as a gallery instead of a spreadsheet. Here is the same data as above, but with another view:
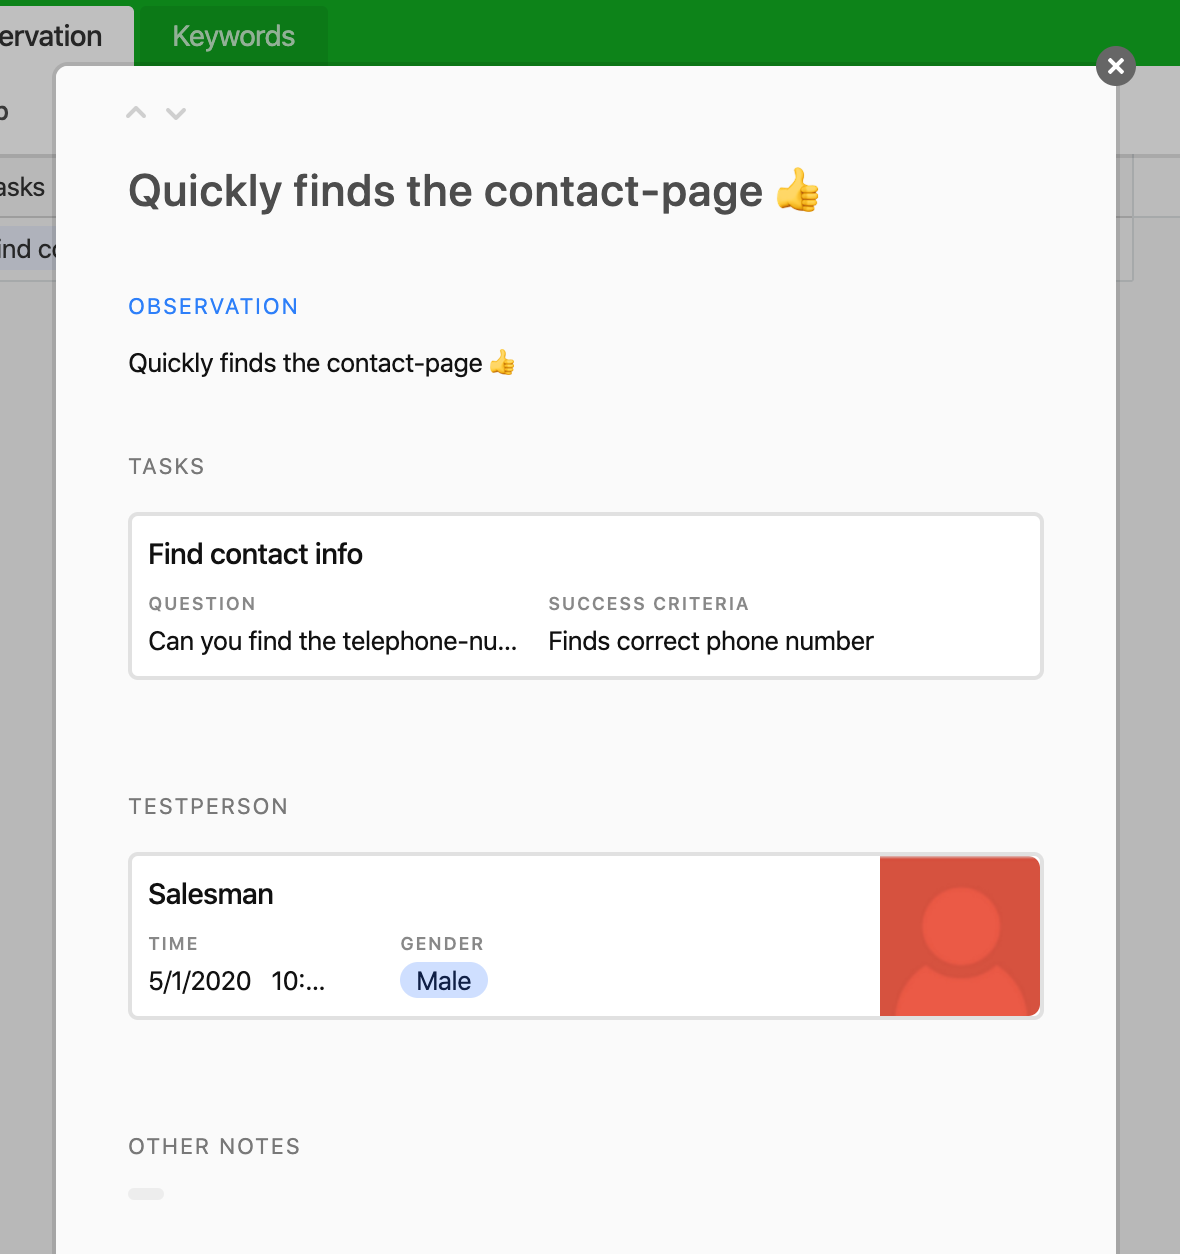
Note-taking during the test
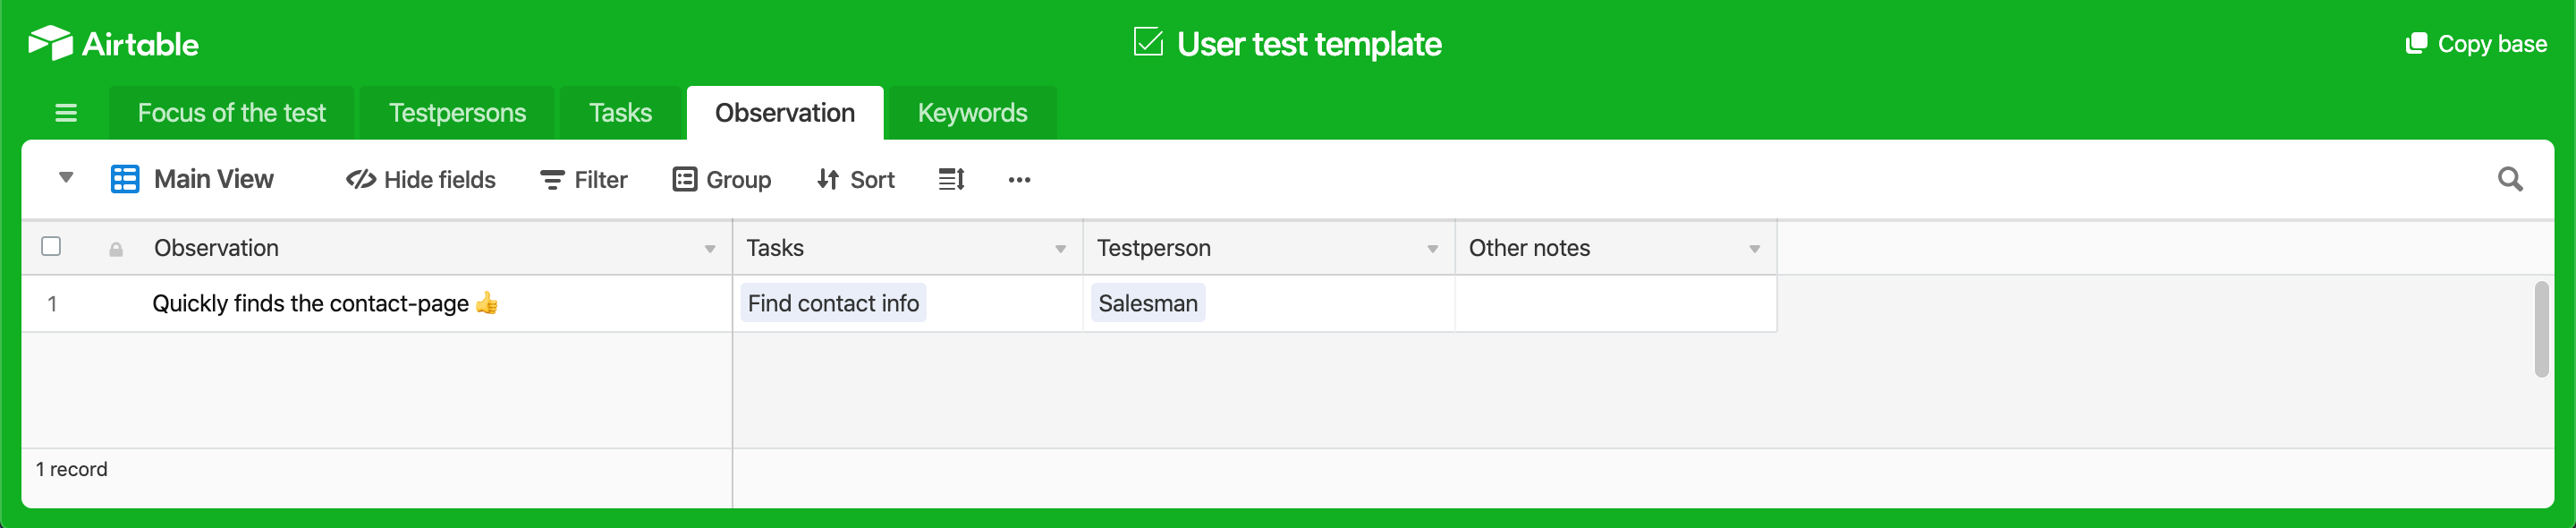
When it comes to the test-day, we take notes in another view in Airtable and link the notes to the person performing them and their task. Here it can be useful to write general statements as “managed to transfer money” so that you can link up multiple test-persons to the same note. This makes it easier to read through your notes afterward.
Emojis 👍👎💣
We’ve also found it useful to add emojis indicating if the finding or behavior is negative or positive for the test.
Review afterwards
After the test is over, we walk through all the tasks. I often find it most useful to go from the task-view and from here see what the different users did on each task and the related quotes. At times I find it more beneficial to go out from the person and see how they solved the different assignments chronologically.
Download
I’ve made a starter template to get you started using Airtable for user-testing. Please give me a word on Twitter if you have some improvements or suggestions!
